Installation
Structure

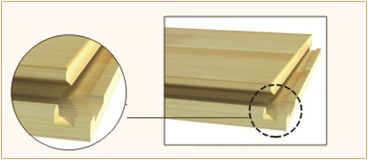
The Up hook
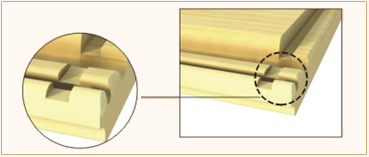
The Low Hook
4-sided Lock-in System Flooring
A flexible groove has been uniquely designed and applied to both long and short sides creating a 4 sided locking system that is both strong and secure once installed. TAP&GO's special 4 sided locking technology ensures that installed floors resist separation after installation.
Droploc click on the short side for UP-HOOK
Droploc click on the short side for LOW-HOOK
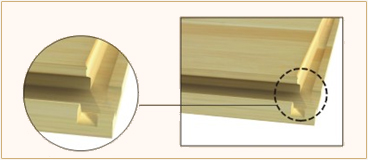
Long-side Lock-in System Flooring (Droploc)
The Drop loc structure offers a convenient, user friendly installation even for the novice home user. The system requires less tapping reducing the risk of breakage or splitting on installation. The com-bination of the drop loc structure on the short side with the original flexible and strong long side ensures a perfect finish when correctly installed.
Preparation
1. Keep The Room Under Suitable Temperature And Humidity
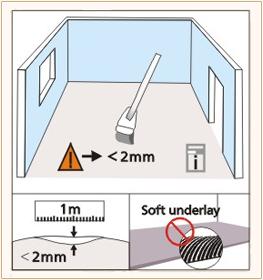
Flatten Base-floor
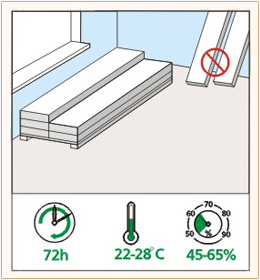
No Wet Floor
Acclimation
We should make inspection of the room before installation.
Firstly, level the ground before the installation and the concrete floor should be smooth, clean, thoroughly dry, and no possibility of leaking water. And the uneven
difference should be less than 2mm.
Before installation, put the flooring in the room for 48-72 hours to acclimate to the room temperature & humidity.
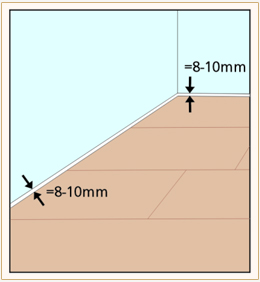
2. Leave Enough Space for Expansion
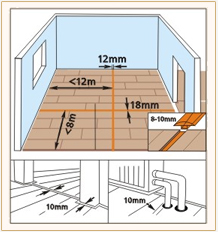
The floor must be able to expand in all directions as the humidity of the room varies under different seasons, The greater the surface area, the more space for expansion required.
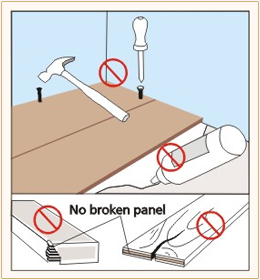
3.Prepare Tools & Accessory
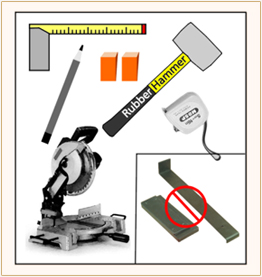
Molding, Underlayment, Rubber mallet, Measuring tape, Chopping saw, adhesive tape, Spade etc. Glue, Tapping block and pulling bar are not required. The broken panel can’t be installed.
Installation
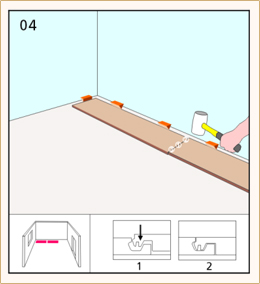
1.Set Up The Underlayment And The First Row of Flooring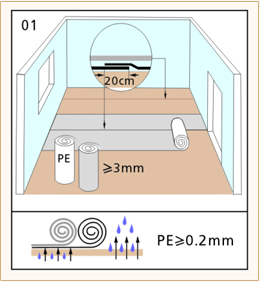
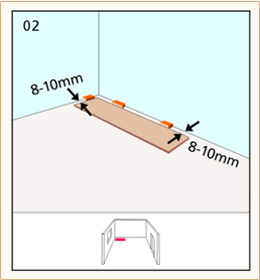

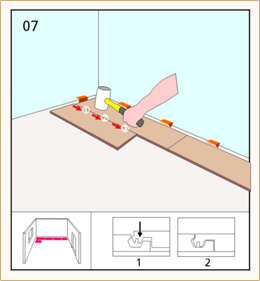
Firstly, set up the underlayment on the ground, make sure that the overlapping area between the foams can reach 20cm, and set the side with EVA foam down to the ground. Make sure that the expansion space is around 12mm; Install the first panel, and then the second one can be put on the short side of the first panel, just press down.
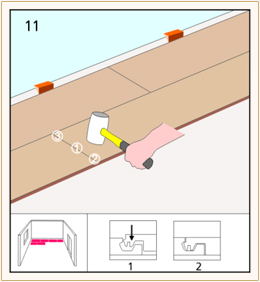
Hammer holding and gentle strength
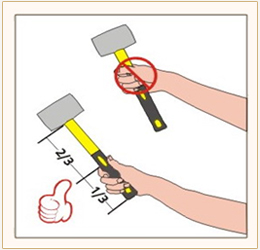
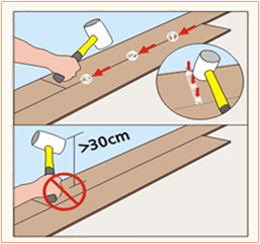
During tapping, It is suggested to hold 1/3 area to the end of mallet. Don’t hold the front area. While tapping, always make sure that the two panels are in the same level and in full touch with the ground. While tapping, make sure that each tap should be on the gap between two pieces floors and don’t tap on the other parts shown as the above picture.
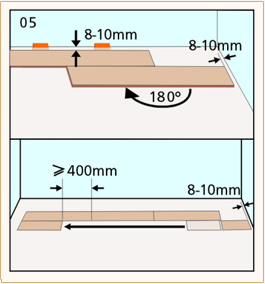
Make sure that the short side of the second panel must strongly lock on the first panel.
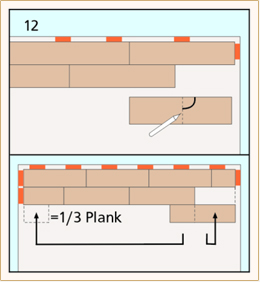
And then saw suitable lenth floor to install the left space.
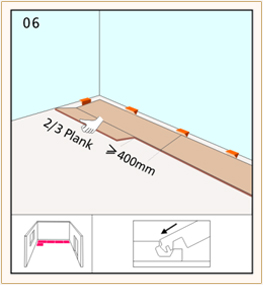
When installing the first panel in the second row, make sure that the distance between short sides should reach over 400mm.
Pay attention to the expansion space.
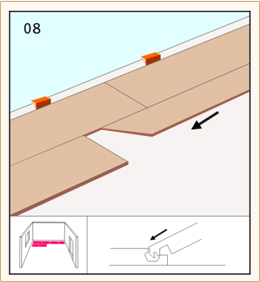
Firstly, tap on the gap of the floors and make sure that they are strongly locked.
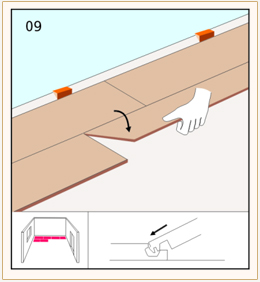
Then install the second panel, make sure that they are fully fixed
After insert, press down with hands, make sure that there are no obvious height difference. Then tap on the gap with rubber mallet.
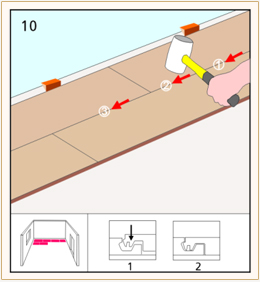
Finish the installation of the second row
After installing the second piece, start with the third one according to above mentioned rules. Make sure that the short and long edge should be fully inserted and fixed, then tap with rubber mallet.
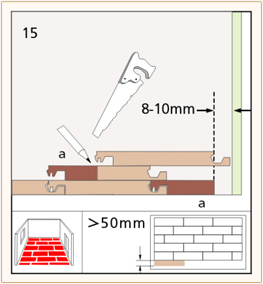
For the left space, please saw suitable length and install. You can use the left-over pieces that you have at the end of each row as the beginning panels of the next row. In that way you could make the best possible use of each panel.
After the first two rows are well installed, please install the other rows fully according to the above ways.
Make sure that each panel is thoroughly inserted and fixed.
3. Special Installation In The Special Place
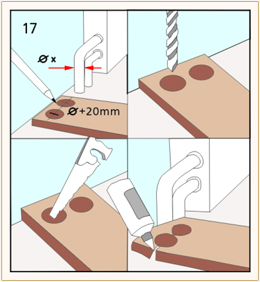
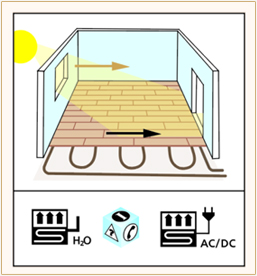
BERGEIM FLOOR can also be used under heating system circumstance;
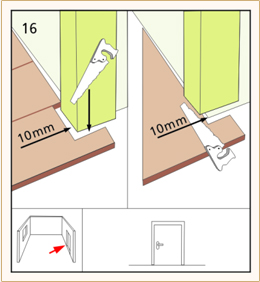
During the installation around the wall corner, please saw the floorings into suitable size and shape, also pay attention to the expansion;
Besides the heating system pipes, drill on the surface of the flooring, cut off, and then glue again. The installation under this circumstance is also easy.
4. Install The Wallbase
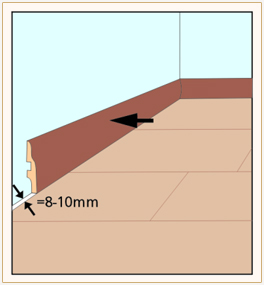
After installation of the floors, and then install the wallbase. Just put this wallbase on the expansion space, and then fix them with nails. If the length of your room is more than 12m, and width over 8m, please use the T-molding to divide the room into suitable areas. In that way, the installed floors are not easy to crack.
Care & Maintenance
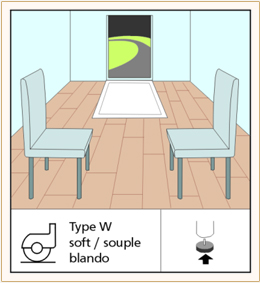
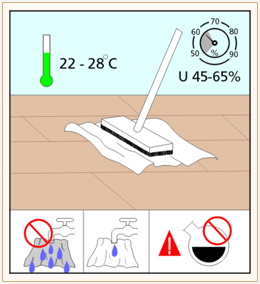
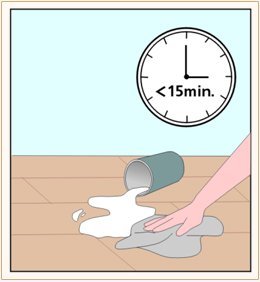
During cleaning the floors, do not make the rug too wet, just drop some drops water. Keep the room temperature usually between 22-28℃; Do not make the feet of furniture too sharp, in order to avoid scratching the floorings; Better clean up the splashed water on the floors within 15 minutes.
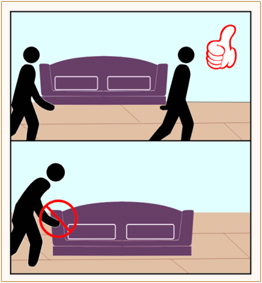
Do not push the furniture into the room, lift it
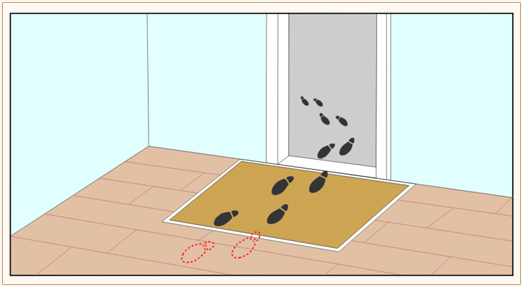
Put one piece carpet besides the entrance to keep the floors clean
Keep the window open when there is nobody in the room to make the room ventilated.